Interior Decoration Design
How to Tile Your Bathroom From Top to Bottom
If your bathroom is a little outdated or you just want a décor refresh, putting down tile may be the upgrade you’re looking for. Not only is tile visually appealing, but it’s simple to install, customize and clean. First time working with tile? With our DIY tile installation guide, you’ll update your bathroom with minimal effort.
Bathroom Tile Installation Cost
On average, it costs between $886 and $2,868 to lay bathroom tiles, including labor. Pricing depends on contractor fees, the type of tile you’re installing and how much you need. The two most common bathroom tiles are ceramic and porcelain, with the latter being more popular and expensive. If you’re trying to cut costs, you can save an extra $20 an hour by laying the tile yourself. You can also save 60% per square foot if you use ceramic tiles over porcelain.
Pick a Place to Tile
To avoid loose, uneven tiles, make sure your bathroom floor and walls are completely flat. If the surface is even slightly sloped, install a base board before putting down tile. This ensures you have a solid base for tiling, and helps it stick. You should use a bubble level for this part of the job.
“Installation practices are the same for walls and floors, but you’ll want to think about what finish and size will be best depending on where you are installing. If your installation is in a wet environment, you’ll want to think about slip factor – going for a smaller size or a non-slip glaze is best.”
Kali Gibson | Fireclay Tile
Basic Tile Installation Guide
Once you’ve selected a style , choose where to start laying tile in your bathroom and prepare your toolbox. Bear in mind that putting down tile isn’t easy. If you’re a perfectionist, cut yourself some slack. Your tiles won’t all be the same length, and cracking is bound to happen. We recommend buying 15% more tile than your bathroom calls for, to ensure you have enough.
“The most important thing while installing any tile is patience. It’s a slow process that cannot be rushed without making mistakes. Done properly tile can last forever. It always starts with the prep work and layout. You can eliminate many issues after the fact by laying out sections of the floor to make sure your cuts will be correct and you don’t have small slivers of tile everywhere. Use the best tools available to you and don’t be afraid to ask for help if you need it before you get in over your head.”
Chris Bates | Tiles Gone Wild
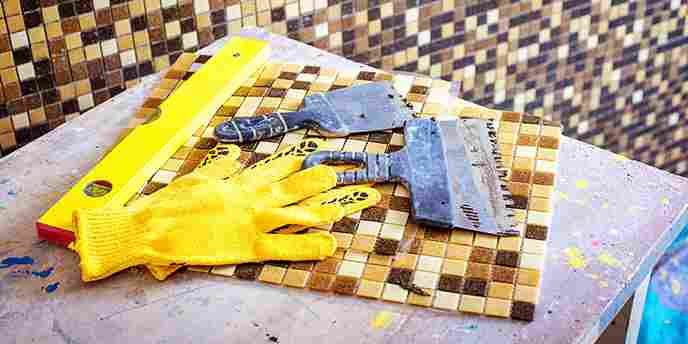
Get Your Bathroom Tiling Tools Ready
Before getting to work, make sure you have the right tools for the job. While ceramic and porcelain tiles are different, the installation process is identical and requires the same equipment. Here’s a basic list of bathroom tiling tools you’ll need:
Start From Scratch
Strip your bathroom of its previous décor. Remove your existing flooring , wallpaper and decorations to prepare for tile installation. If you already have tiled walls and floors, make sure to replace the bathroom tile properly. Try not to nick your sink, toilet, bathtub or any other fixture you plan on keeping. We also recommend “dry laying” your tile before committing to a certain style or layout.
“Always dry lay your tile before you apply any mortar. To dry lay tile, place all your tiles in position, so you can see what the finished result will look like before you actually begin the installation. This process lets you test the layout, ensure that colors and textures flow well and avoid making mistakes.”
Chelsi Hewitt | Flooring Inc.
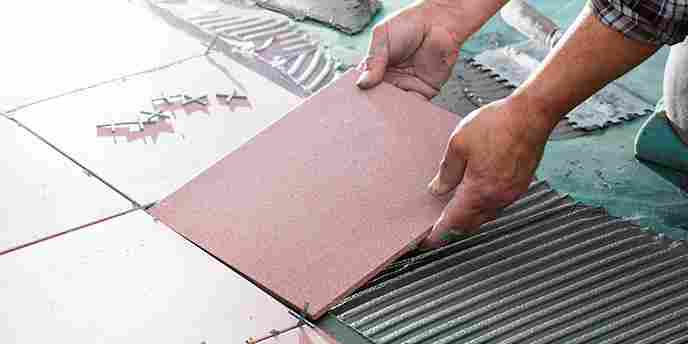
How to Lay Bathroom Floor Tiles
Once you’ve prepped your subfloor, determine how much tile you need. To do this, multiply your bathroom floor’s length and width to calculate square footage. Remember to buy more tile than you need to ensure you have enough. Once you have adequate tools and materials, you can start laying bathroom floor tiles. We recommend starting in the corner of your bathroom, so you can square up with the wall.
1. Spread the tile mortar
Use your notch trowel to spread tile mortar across your bathroom floor.
2. Install the tile membrane
Lay down your tile membrane in sections until the wet tile mortar is completely covered.
3. Make a reference line
Use your chalk line to make a light line across the tile membrane. This helps keep your tiles straight.
4. Put down your tile
Spread another layer of tile mortar over the membrane and lay bathroom floor tiles along the chalk line. Use your tile spacers to keep the pattern even and consistent.
5. Tile your bathroom’s perimeter
To border your bathroom floor, make a half inch mark on the tile and cut it with your wet saw. Repeat this step for each tile row, and install the resized tiles around the perimeter of your bathroom. This ensures you have enough room for baseboards along the bottom of your wall.
6. Clean your tiles
Tile mortar often sticks to your freshly-laid tiles. Use a wet sponge to wipe them off as you work.
7. Start grouting
Wait 24 hours before grouting your tiles. Then, use your rubber flat to spread the grout between your tiles – make sure to do this in a diagonal pattern.
8. Apply silicon sealant
After 72 hours, you can walk on your tiles and apply silicon sealant around the border of your bathroom. This helps keep your freshly-laid tiles in place.
9. Enjoy your bathroom floor
With a tiled floor, cleaning your bathroom will be easier and much less time-consuming.
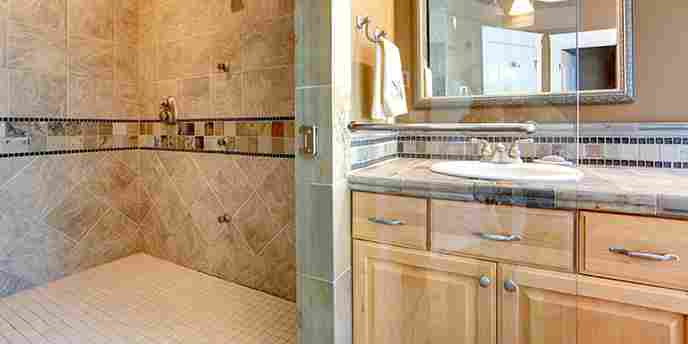
How to Tile a Bathroom Wall
If you’re tiling a bathroom wall, choose a stopping point. Unless you’re tiling the entire wall, measure how high your tiles will reach and make a line. In bathroom tile installation, it’s important to know where the pattern will start and where it will end. You should also start laying tile in the center of your wall, to keep the pattern straight and aligned.
“For wall tile, you’ll want to use the more traditional centering approach. Centering the tiles on the back wall of a shower or bathtub surround is very common.”
James Upton | DIY Tile Guy
1. Measure your tiles
Put 10 tiles in a row and measure the length. If you’re using uneven tile, divide this number by 10 to calculate its dimensions.
2. Make a line
Use your bubble level to make a top line on the wall you’re tiling – this will be your stopping point.
3. Determine how high you’re tiling
Measure the length of your wall from top to bottom. If you’re only tiling part of the wall, measure from the floor to your top line.
4. Determine how many rows you’ll have
If your wall won’t end on a complete row of tiles, adjust your top line. In the end, you’ll want to have complete, full rows of tile.
5. Make a grid
Using your chalk line, make a rectangular grid along your bathroom wall. This helps keep your tiles even.
6. Install a batten
Halfway between your floor and top line, install a wooden plank – use your bubble level to make sure it’s even. This keeps your first tile row completely straight, and simplifies the rest of your tiling job.
7. Spread the tile mortar
Coat your wall in tile mortar using a notch trowel. It’s important to follow your rectangular grid, and spread the adhesive vertically. If any mortar dirties your tile, use a wet sponge to wipe it off.
8. Install the tile
Tile your wall, starting on the wooden plank and working your way up.
9. Keep tiling
Continue tiling your wall until it’s completely covered. Work in a diagonal pattern, and remember to take breaks. Once you’ve tiled the first part of your wall, wait 12 hours to remove the wooden plank and install the second half.
10. Enjoy your tiled bathroom wall
When your tiled wall is set and secure, admire your hard work.
Photo: Benita Cooper Design
How to Install Backsplash Tile
Want to add a bit of color to your bathroom? Try installing backsplash tile. Typically laid between your sink and medicine chest, backsplash gives your bathroom a touch of personal style. While the process is similar to tiling an entire wall, your measurements should be taken even more carefully.
“Installing backsplash tile is very similar to installing wall tile in terms of establishing the high point using a level and staggering your grout lines. However, unlike bathroom floors, backsplashes are not expected to see large amounts of water on a daily basis.”
Andrew Thron | Thron Home Improvements
1. Inspect the wall
Take note of any important outlets on your wall, and be careful not to tile over them.
2. Make a midway point
Install a wooden batten in the middle of your wall. This will be your starting point.
3. Spread the tile mortar
Use your notch trowel to coat the wall in tile mortar. We recommend doing this in sections.
4. Start tiling
Starting at the wooden batten, lay your tiles in a stair-like pattern. Remember to avoid any important outlets.
5. Finish the wall
After 12 hours, remove the wooden plank and tile the rest of your backsplash wall. Use tile spacers to keep the pattern even and consistent.
6. Grout the wall
About 24 hours after you’ve finished tiling, grout your tiles to keep them shiny and clean. You can do this with your notch trowel.
7. Enjoy your backsplash tile
Once you’ve installed backsplash tile, enjoy it! Unlike your floors and shower walls, backsplash gives your bathroom personal flair.
Start Your Cleanup
If you had to rip out carpet or remove old flooring before tiling your bathroom, get rid of it sooner rather than later. In most cases, these materials can be tossed with your regular household trash. However, if you’re tiling a master bathroom, you may need a dumpster to haul away the mess. This is especially important for heavy tile and panels.
Projects to Tackle After Tiling Your Bathroom
Tiling your bathroom is meticulous and time-consuming, so take a much-needed rest once you’ve finished. Ready to get back to work? Consider other ways you can upgrade your bathroom. Whether you’re tackling a full-on renovation or need to save on space, we have you covered:
Your comment